Dedicated to sifting through the detritus accumulated in my studio life, Studio Debris
 Subscribe here to the STUDIO DEBRIS rss feed via the service of your choice.
Dedicated to sifting through the detritus accumulated in my studio life, Studio Debris
Subscribe here to the STUDIO DEBRIS rss feed via the service of your choice.
I have always had a love for paper that goes beyond the expected excitement of a blank, white sheet ready for the artist’s first mark. As a small child, I spent hours poring over the decorator’s hefty wallpaper sample books, left over from our 1977 home renovations: the mirrored backgrounds…the bold florals or geometric patterns rendered in one exciting colorway after another. In my early days, these enormous, psychedelic volumes rivaled even Dr. Seuss and Eric Carle for my affections.
Many years later, I helped fund my way through art school by working in the cataloging department of my college library. My love for found papers, combined with my passion for words inspired me to stash away hundreds of colorful book jackets, typically discarded during the cataloging process. Fast-forward another decade or so, and here I am in my studio, surrounded by several Tupperware storage bins full of vintage paper ephemera that desperately needs purging!
Unlike my vintage giftwrap and wallpaper collections, these heavyweight, coated book jackets don’t offer enough regular patterning or figuration to make them appropriate for the mixed-media art collages that I often create. They are text heavy, and extremely varied in coloration. With some creative experimentation, using some tools I had available I created this unique DIY project for my sturdy and colorful paper source.
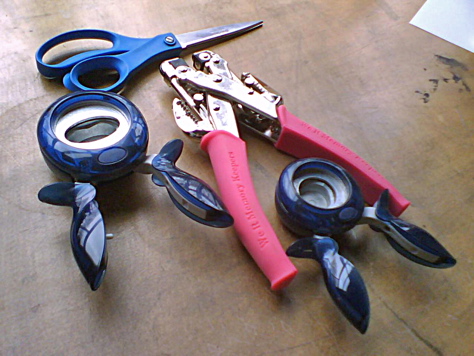
What you will need:
If you don’t have any, check with your local public or college library, as they often discard book jackets during their cataloging process for incoming new books.
With your scissors, cut 8-10 equal-length strips from your book cover(s), measuring approximately ¼” wide. For this project, I cut from top to bottom, for strips approximately 9” long. This length yields a final product approximately 3 ½”-4” wide. You can experiment with different strip lengths and numbers for varying effects.
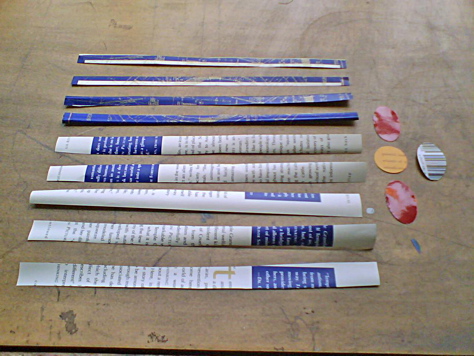
Using your 1” circle paper punch, cut out two circles. One will be the flower bow’s “center”, and the other will serve to hold the double-sided tape to the bow's base; so, try to cut one bright circle and one boring circle, as the latter will be covered up. Then, using your 1.5” oval punch, cut out 2-4 ovals. These will surround the bow’s center circle, so experiment with different colors, i.e. white with text or a contrasting color to the center circle color choice.
Cut a 1 ½” piece of double sided tape, and after peeling one side, stick it over the bottom circle, centered, so that a small portion hangs off either side.
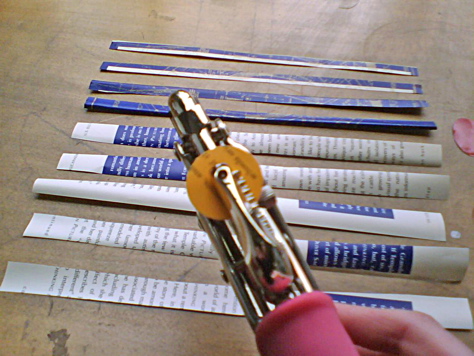
Using your 1/8” paper punch, punch a hole in the center of each circle, oval and strip you have prepared. You may line up your strips and punch them all at once to save time, but try to hit the center of each strip. Punch the bottom circle right through the tape, with the hole in the center.
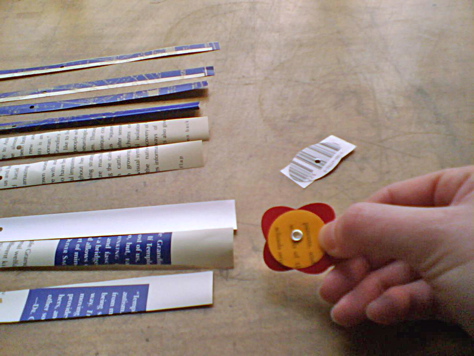
Now, take an eyelet, and place it through your bright center circle, with the uncrimped tube coming out of the back of the circle. Working front to back, place the ovals behind the circle, arrayed in a cross formation.
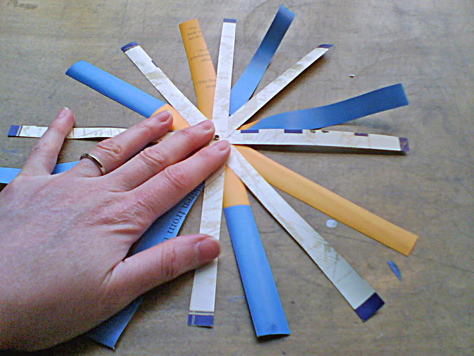
For the next step, turn the arrangement over so that you are looking at the back of the last oval. Start to place your strips over the eyelet tube, starting with a cross formation, and filling in at 45 degree angles to the cross. Note that you want to be placing the colored portion of these strips up, facing you.
After placing all of your strips, place the bottom circle over the eyelet tube, pressing the sticky sides against the surrounding shapes to help hold it in place. (Do not peel the tape paper from the opposite side, this stays covered until the bow's use!)
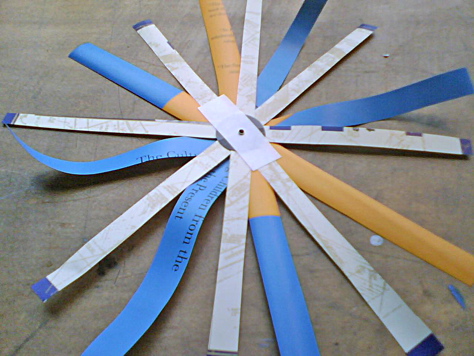
Using your eyelet setting tool, or Crop-o-dile, set or crimp the eyelet so that the whole stack of papers is set firmly together. If using a Crop-o-dile, carefully pick up the stack, holding it pinched in the center just to the side of the eyelet. You may carefully bend back one of the strips to provide access to the crimp tool, but try not to shift the paper strips.
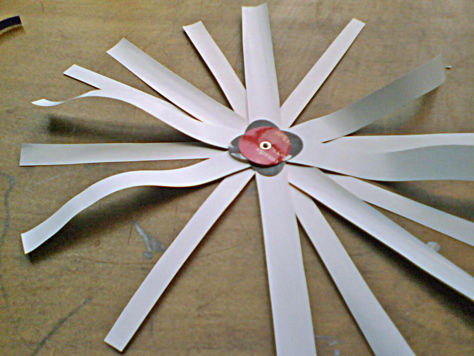
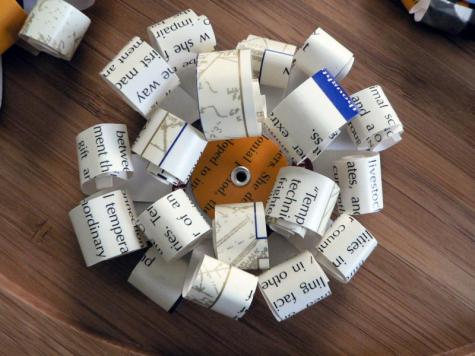
You will end up with a flower, or sun shape. Flip this over so that the center circle is on top, as shown. Starting with the topmost two strips, which form the center cross, begin rolling the strips in towards the center, one at a time. You may use your fingers, as I did, or the barrel of a pencil or pen to help you roll. Because book cover paper is coated, it holds a curl shape very well.
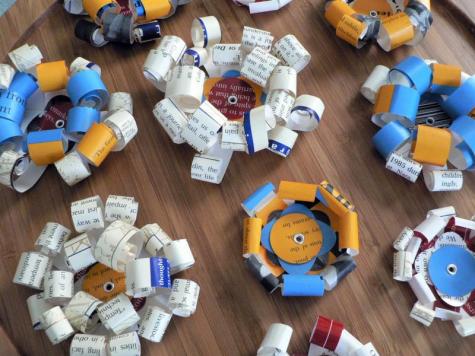
Continue rolling your strips in until all have been completed. You will end up with a fluffy, flower shape (with a peel-off tape bottom), which can be used to decorate special gifts, embellish mirror or picture frames, or anything that needs a little upcycled decorative love!
These pictured examples, and other original creations of mine can be found on Etsy! Visit my main design shop, Crostini, for original art, jewelry and prints - and my vintage & supply arm, crostini*VS for upcycled paper goods and unique vintage / crafting supplies.


ART & ARTISTS
Anna Shapiro
Art Blog Catalog
Artforum
artkrush
Artscope Magazine
Big, Red & Shiny
Marcus Ahlers
Sarah Hardesty
DESIGN & LIFESTYLE
Book By Its Cover
Core77
Design*Sponge
greenUPGRADER
Indiepublic
Lavender and Limes
PROVIDENCE / R.I.
AS220
Firehouse 13
IndieArts RI
the Steel Yard
YES Gallery + Studio

Comments
very cool idea! I must try
very cool idea! I must try one of these days! thx for sharing!